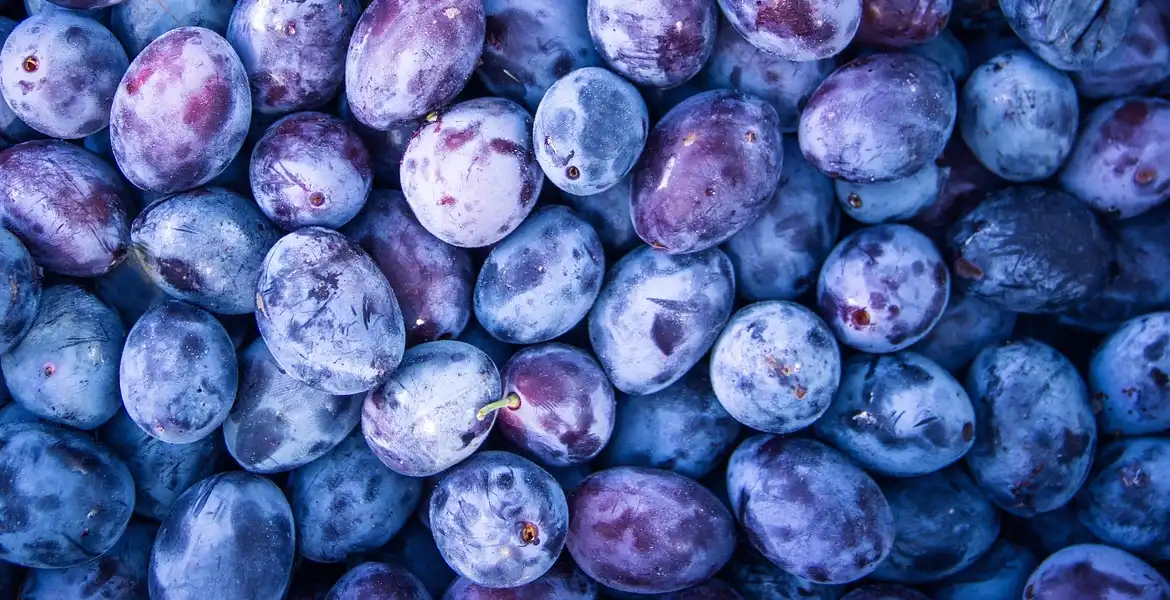
Plums aren’t just for jams and pies, they’re the golden ticket to one of the most delicious homemade wines you’ll ever sip. Bursting with natural sugar, vibrant acidity, and whispers of cherry and blackberry, Plum Wine is a summer harvest transformed into liquid artistry. Whether your backyard tree is groaning with fruit or you’ve scored a market haul, this forgiving recipe turns abundance into something extraordinary.
As a winemaker, I’ve tested countless batches, and let me confess, a well-crafted Plum Wine is among my favorites. Its strong fruit flavors and long finish make it the star of winter gatherings (or a secret midnight pour). Best of all, you don’t need fancy equipment or years of experience, just Plums, patience, and my tried-and-true method.
Ready to ferment brilliance? Dust off your Fermenter, we’re diving into the art of homemade Plum Wine.
Start Making Homemade Plum Wine: Our Secret
Our recipes are easy to follow. We’ve structured the winemaking process into distinct “Days”, each marking a critical phase in your Plum Wine’s lifecycle. Notice how the early stages need regular actions, followed by extended periods of patience as nature works its magic. We recommend you bookmark this page so it’s simple to come back and refer to our guide.

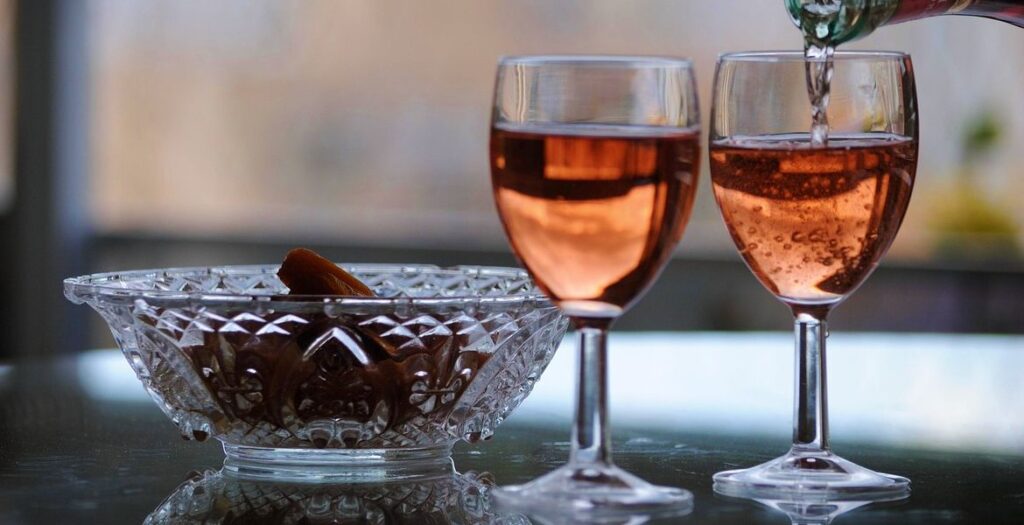
Plum Wine – a summer secret perfect for winter nights
Fermentistry.com
Ingredients For Making Homemade Plum Wine: Road To Perfection
The list of ingredients for making Homemade Plum Wine is short and sweet.
- 2 kg (4.4 lb) Ripe Plums
- 1.2 kg (2.6 lb) Sugar (Demerara is best, White sugar is fine)
- Water 4.5 Liters (1.2 US Gallons) (1 Imp Gallon)
- Wine Yeast (we recommend a premium red wine yeast: RC 212 works well with the fruit flavor)
- Wine Nutrient Salts
- Pectinase 5 gm (1 teaspoon)
- Citric Acid 2.5 gm (1/2 teaspoons)
- Campden Tablets or 10% Sodium Metabisulfite solution
Go to our Essential Wine Making Supplies page to restock items you need.
Equipment For Making Homemade Plum Wine: Makes It Easy
At first glance, the equipment list for making Plum Wine might seem intimidating, but don’t let it worry you. Most of these items are likely already tucked away in your kitchen. And here’s the best part, you won’t need everything at once!
As the process unfolds in stages “Days”, you can even gather equipment as you go. The list below is the complete list of every piece of equipment you’ll need over the coming days and weeks. Bookmark this page so you can come back.
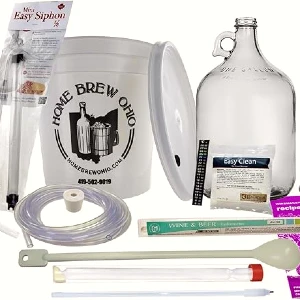
If you’re a beginner, you’ll find a “Fermentistry Approved” list of equipment on this page Basic Wine Making Equipment: Essential For Professional Results. We even have a package containing everything a beginners needs, to get you started fast!
- Primary Fermenter. Where your first Fermentation takes place
- Secondary Fermenter. Same as Primary Fermenter, used for Racking
- Fermenter Airlock. To let Carbon Dioxide escape and keep air out
- Food grade plastic bucket and lid 10 Liter (2.6 US Gallons) (2.2 Imp Gallons). Used for Juice Extraction
- Alcohol Hydrometer
- Measuring Cylinder 100 ml or tall glass (needs room for your Hydrometer to float freely)
- Brewing Siphon
- Note book and pen
As an Amazon Associate I earn from qualifying purchases.
Equipment For Making Homemade Plum Wine: Found In Your Kitchen
The following is a list of equipment you’ll probably already have stored in your kitchen. Just read the list and take a note of what you’ll need.
- Large Funnel with narrow neck
- Glass Jar and Lid
- Kitchen Measuring Spoons
- Kitchen Long Handle Spoon
- Kitchen Measuring Jug
- Kitchen Scales
- Kitchen Sieve (Large)
- Kitchen Bowl
- Kitchen Stock Pot (larger than 5 Liters (1.3 US Gallons) (1.1 Imp Gallons)
- Kitchen Potato Masher
- Note book and pen
- Water Filter Jug. Used to remove Chlorine from tap water (you may not need this)
Homemade Plum Wine: Flavor Profile
Following our recipe you’ll make a Plum Wine with the following flavor profile. As your wine ages, this flavor profile will subtly change. Plum Wine (made with dark skinned plums) has a fruit aroma with the flavors of Plum, Cherry and Blackberry.
- Sweetness: medium-dry
- Acidity: medium
- Tannin: medium
- Alcohol: medium
- Body: medium
- Flavor intensity: medium
- Finish: medium
Balance Acidity Of Homemade Plum Wine: Make It Delicious
Let’s talk about the acidity of your Plum Wine and why it’s so important to get it right. Too little acidity, and your wine tastes flat. Too much acidity and it tastes like an unripe lemon. Our recipe aims for that sweet-spot in the middle where your palate will sing with joy.
There is another good reason to ensure your juice has a high acidity (low pH). Juice low in acid is also susceptible to bacterial infection. By maintaining acidity below pH 4, you significantly reduce the chances of an infection occurring.
For the home wine maker there is an acidity sweet-spot, between a pH of 3.0 and pH 4.0. By following our recipe, you’ll create a juice with an approximate pH 3.8. This is a safe place for you to ferment a wine.
Here’s the fun part, you can tweak the pH like a flavor dial depending on the flavor profile you are designing. Those of you with access to a pH Meter (it’s worth investing in a pH Meter it makes testing acidity so easy), you can tweak this setting by adding Tartaric Acid or Citric Acid to create your own flavor profile. Always take the time to taste your juice(Must) after making an adjustment and make additions of Tartaric Acid or Citric Acid a quarter teaspoon at a time until you reach the desired level.
How To Make Homemade Plum Wine: Steps To Success
Before diving in, we recommend reading through the entire guide so you understand the timeline. This makes it easy to know when to act and when to wait, maximizing the fun you’ll have crafting your exceptional Plum Wine.
Day 1
How to prepare Plums for wine making – you can do it!
Step 1: Clean Plums Gives Pure Flavor
Wash any dirt off your whole Plums with tap water. At the same time separate the fruit from any leaves and stems. Place your clean fruit aside.
In an ideal world we’d remove the stones from your Plums, and we’d have 2 kg (4.4 pounds) of stone free fruit when you’re done. Unlike other stone fruit, Plums are a nightmare to deseed. So we are not going to try and cut the fruit flesh away from the stone. Instead, we’re going to leave the stone in the fruit as we have another way of working with the fruit as they are.
At this point weigh your Plums, remembering to account for the weight of the bowl. Be certain you reach the 2 kg (4.4 pound) target weight. Finally, remember to eat some Plums fresh, though not too many.
Step 2: Clean Plums Wine Equipment Prevent Spoilage
The cornerstone of wine making success lies in the cleanliness of your equipment. The first step is to ensure all equipment is thoroughly cleaned using standard detergent or better PBW (Powdered Brewery Wash). Persistent stains can be effectively removed with a quality bottle brush or a soft cloth.
Once the equipment is impeccably cleaned, it’s time for Sanitization. We highly recommend chemical sanitization due to its long lasting effect. Chemical sanitization continues to protect your equipment for a period after the initial treatment. We recommend using a Sodium Metabisulfite based sanitizer.
Check out our article How to Clean and Sanitize Winemaking Equipment for a detailed guide to the process.
On Day 1, you need to clean and Sanitize the following items:
- Food grade plastic bucket and lid 10 Liter (2.6 US Gallons) (2.2 Imp Gallons). Used for Juice Extraction
- Kitchen Stock Pot
- Kitchen Potato Masher
- Kitchen Measuring Spoons
- Glass jar and lid
Step 3: Extract Maximum Flavor From Plums Foundation Of Winemaking Success
Using your cleaned and sanitized Food Grade Plastic Bucket, add all your washed Plums. Using a kitchen Stock Pot, bring 4.5 Liters (1.2 US Gallons) (1 Imp Gallon) of Water to the boil, then let the water sit for 5 minutes. It’s important not to add boiling water to Plums. Once the water has rested for 5 minutes, then carefully add the hot water to the Bucket over top of your Plums. Leave this to sit for 5 minutes with the lid off so the fruit can soften.
Using your Potato Masher, press down on the Plums for a few minutes to release the fruit pulp and color. The liquid will become a cloudy deep red/purple. You don’t need to mash the fruit completely, use enough pressure to break them up a little and release the flavor from the Plums.
Put the lid on the Bucket and press down firmly. Lift one side of the lid open a little, we want a gap to let air and heat escape. Place your bucket in a warm safe place away from light. It needs to sit for 1 day.

Step 4: A Yeast Starter For Homemade Plum Wine Will Start Fermentation Fast
The fact is, it’s just better to make a Yeast Starter. A Yeast Starter is created by adding your Yeast to a sanitized Glass Jar with water, sugar and Wine Nutrient Salts. The primary purpose is to check your Yeast is active before you add it to your precious fruit juice. There are other advantages as well.
Learn all about creating your own Yeast Starter from our article How To Make A Yeast Starter. Make your Yeast Starter on Day 1, you’ll need it in a couple of days.
Day 2
Get maximum flavor from Plums for wine making
On Day 2, you need the following supplies:
- Plum Juice (Must)
- Pectinase 5 gm (1 teaspoon)
- Campden Tablet (1 tablet) or 1 Teaspoon 10% Sodium Metabisulfite solution
On Day 2, you need to clean and sanitize the following equipment:
- Kitchen Measuring Spoons
- Kitchen Long Handle Spoon
Step 5: Add Pectinase To Plums
Once the bucket of Plums and liquid is cool, after about 1 day (24 hours), add 1 teaspoon (5 gm) of Pectinase and 1 crushed Campden Tablet to the Bucket of fruit and liquid. The Pectinase is to help extract the juice from the Plums. The Pectinase needs to sit on the fruit for 24 hours before it’s complete. Replace the lid on the bucket and take a minute to carefully swirl the mixture around.
I’ll explain what we just did. We added the Campden Tablet (Sodium Metabisulfite) to kill any Wild Yeast that might get into our juice known as “Must“. Swirling our Must achieves 2 goals, mixing the Sodium Metabisulfite through the solution and mixing Oxygen into the solution. Oxygen is needed by the Yeast during Primary Fermentation. We’re getting the Must ready for the Yeast that you’ve got growing in your Yeast Starter.
Day 3
Let’s get your Plum juice fermenting
On Day 3, you need the following supplies:
- Plum Juice (Must)
- 2 kg (4.4 lb) Sugar (Demerara is best, White sugar is fine)
- Campden Tablet (1 tablet) or 1 Teaspoon 10% Sodium Metabisulfite solution
- Wine Nutrient Salts 5gm (1 teaspoon)
- Citric Acid 2.5 gm (1/2 teaspoon)
On Day 3, you need to clean and sanitize the following equipment:
- Primary Fermenter
- Fermenter Airlock
- Measuring Cylinder 100 ml or tall glass (needs room for your Hydrometer to float freely)
- Kitchen Potato Masher
- Kitchen Measuring Spoons
- Kitchen Sieve (Large)
- Kitchen Long Handle Spoon
Step 6: Get Your Plum Juice Ready For The Fermenter
We need to clean and sanitized the Primary Fermenter, Measuring Cylinder, Kitchen Potato Masher, Kitchen Measuring Spoons, Kitchen Sieve and Kitchen Long Handle Spoon. Put aside some Sanitizing solution, we’ll use this later in your Air Lock. Using you Potato Masher, press the fruit in your bucket to break them up. The fruit pulp will float and the fruit stones will sink in the juice.
Step 7: Dissolve Sugar Into The Plum Juice
To the Primary Fermenter, add the following ingredients, while carefully measuring each with your Kitchen Measuring Spoons or Kitchen Scales:
- Wine Nutrient Salts 5 gm (1 teaspoon)
- Citric Acid 2.5 gm (1/2 teaspoon)
- 0.8 kg (1.8 lb) Sugar (note this is 2 thirds of the sugar).
Pour the Plum juice through the large kitchen sieve into the Primary Fermenter over the dry ingredients. The sieve will catch the fruit pulp and seeds during the transfer. Once all the Plum juice is transferred, use your long handle spoon to stir the mixture. Stir until you can feel the sugar is dissolved into the solution. Stirring is also a good way to add air to your mixture. Discard the fruit pulp and seeds caught in your kitchen sieve.
Step 8: Note The Specific Gravity Of Your Plum Juice
Pour out 100 ml of your Plum Must (juice) into your Measuring Cylinder and place this on your kitchen bench top. Place your Alcohol Hydrometer into the liquid and spin with your fingers. Spinning the Hydrometer causes it to clear any bubbles and to settle more quickly.
Step 9: Add Yeast To Your Plum Juice
To your Primary Fermenter we’re now ready to add the Yeast. It’s time to add your Yeast Starter to the Plum Must and start the fermentation process. A successful Yeast Starter is creamy and bubbly and this tells us it’s ready for use. Tighten the lid on your Yeast Starter jar, shake the jar for a few seconds. Now pour off half of the Yeast Starter into your Plum Must in the Primary Fermenter.
Put the lid on your Fermenter, insert the Airlock (filled with Sanitizer). Gently swirl the mixture around in your Fermenter. Do this for 30 seconds.
Carefully move your Primary Fermenter to a warm dark place. Keep it at approximately 20 Celsius (70 Fahrenheit). This is where your Yeast Starter will come to life and convert your Plum Must into wine.
Step 10: Let Your Plum Must Ferment
From Day 3 to Day 28 you will have see vigorous Fermentation where there are bubbles on the surface of your Must and gas bubbling through your Airlock. By Day 22, Fermentation will start to slow. This is normal, there is nothing to worry about. Leave your Fermenter and let the Yeast work hard for you.
Day 28
It’s time for Racking and Aging
On Day 28, you need the following supplies:
- 0.4 kg (0.9 lb) Sugar (the sugar you set aside in Day 3)
- 1 Campden Tablet or 1 teaspoon 10% Sodium Metabisulfite solution
On Day 28, you need to clean and sanitize the following equipment:
- Secondary Fermenter. Same as Primary Fermenter, used for Racking
- Fermenter Airlock. To let Carbon Dioxide escape and keep air out
- Alcohol Hydrometer
- Measuring Cylinder 100 ml or tall glass. Needs room for your Hydrometer to float freely
- Brewing Siphon
We need to clean and sanitized the Secondary Fermenter, Measuring Cylinder, Alcohol Hydrometer, and Brewing Siphon. Put aside some Sanitizing solution, we’ll use this later in your air lock.
Step 11: Rack Your Plum Wine
It’s time to set your Plum Wine up for aging. To do this we need to transfer it from the Primary Fermenter to the Secondary Fermenter, leaving behind the Sediment and any fruit pulp. The Sediment and fruit pulp, known as the Lees, gradually settles during Fermentation leading to the natural clarification of the wine. The technique employed to remove wine from the Sediment is referred to as Racking.
Read our article Racking Wine The Expert Guide for a detailed explanation of the process.
Step 12: Note The Specific Gravity Of Your Plum Wine
Pour out 100 ml of your Plum Wine into your Measuring Cylinder and place this on your kitchen bench top. Place your Alcohol Hydrometer into the liquid and spin with your fingers. Spinning the Hydrometer causes it to clear any bubbles and to settle more quickly. Take a note of the reading.
Step 13: Add Sugar To Your Wine
Take the sugar you set aside on Day 3 and add this to the Plum Wine in your Secondary Fermenter. The Yeast in your wine will now start converting this sugar into alcohol and boost the alcohol in your wine. We add sugar in parts so that we don’t overwhelm the yeast with too much all at once.
Step 14: Aging Your Plum Wine
You’ve transferred your Wine into your freshly sanitized Secondary Fermenter using the Brewing Siphon. Put the lid on your Fermenter and insert the Airlock (filled with Sanitizer). Move your Fermenter to a dark cool place where it can rest for 5 months. At this stage you have Fermented Plum juice which is technically Wine. Leaving it to Age is the secret to transforming from just Fermented juice into a good Wine. Aging is the secret.
Day 180
It’s time to get your Plum Wine into the bottles
On Day 180, you need the following supplies:
- Sodium Metabisulfite solution
On Day 180, you need to clean and sanitize the following equipment:
- Alcohol Hydrometer
- Measuring Cylinder 100 ml or tall glass. Needs room for your Hydrometer to float freely
- Brewing Siphon
- 4 Flip-top or Swing-top Wine Bottles 1 Liter (33 fluid ounces) each in Brown or Green Glass
Before transferring the Plum Wine from your Fermenter, you must clean and sanitize each Flip-top bottle and Lid, your Measuring Cylinder, Alcohol Hydrometer, and Brewing Siphon. This is essential, so take your time and make sure each piece of equipment is carefully prepared.
Step 15: Note The Specific Gravity Of Your Plum Wine
Pour out 100 ml of your Plum Wine into your Measuring Cylinder and place this on your kitchen bench top. Place your Alcohol Hydrometer into the liquid and spin with your fingers. Spinning the Hydrometer causes it to clear any bubbles and to settle more quickly. Take a note of the reading. Expect to see a reading between 1.005 and 0.990.
Step 16: Bottle Your Plum Wine
Carefully place your Fermenter on a benchtop without stirring or disturbing your wine. We want to keep any sediment on the bottom. Remove the lid of the Fermenter and insert your Siphon. As with Siphoning between Fermenters, place your bottles below the level of your Fermenter, on the floor. Prime your Siphon and transfer your Plum Wine into each Bottle filling to 2.5 centimeters (1 inch) from the lid. Replace the cap and push the clamp down.
A Label Makes Your Wine Memorable
Labelling each of your precious bottles is important. A professionally labeled wine bottle elevates your wine from “homemade” to “artisanal.” An attractive label enhances perceived quality, making your wine more appealing for gifting, competitions, or personal pride. Our labels are designed to reflect the care you put into your craft, ensuring your Plum Wine looks as incredible as it tastes.

Join hundreds of home winemakers who trust our expertise. Browse our collection today and give your wine the presentation it deserves.
5 Gallon Plum Wine Recipe
Our Plum Wine recipe is proportioned for making 1 Imperial Gallon. We chose 1 Gallon as it’s easy to scale the recipe to the size you need. For example, to make 5 Gallons of Plum Wine, simply multiply all the Ingredient for Plum Wine (listed above ) by a factor of 5.
Patience is a Winemaker’s Greatest Skill: Mastering the Art of Perfect Homemade Wine
In the world of winemaking, patience isn’t just a virtue it’s a necessity. The journey from fruit to glass is a meticulous process that cannot be rushed. Each step, from processing the fruit into Must to allowing the wine to age gracefully, requires time and careful attention. The art and science of winemaking is a testament to the adage, “good things come to those who wait”.
Just as a fine wine develops its complex flavors and aromas over time, so too does the winemaker’s craft evolve with experience and dedication. There are no shortcuts in this age-old tradition, every bottle of wine is a celebration of human artistry, nature and especially time. The sooner you start making wine, the sooner you’ll be enjoying the fruits of your labor.

Final Words: Delicious Homemade Plum Wine Recipe
Making great Plum Wine isn’t about perfection, it’s about paying attention. Did you resist the urge to peek in the Fermenter every day? It’s not ideal, but we’ve all been there. Resisting those little choices add up to something extraordinary. And when you finally “uncork” that first bottle, you’ll taste more than just wine, you’ll taste the pride of your creation.
Remember this. Every great Winemaker starts exactly where you are now, with curiosity, a handful of fruit, and the guts to try. Once you’re hooked on wine making, you’ll start planning the next batch before finishing the last. So go and look over our Wine Recipes and choose your next project. They are waiting for you right now!
And when you “pull the cork” on your first bottle of Plum Wine, don’t forget to share your victory with us. We’d love to read all about your success, so drop us a line and tell us everything.